A while ago, a tutorial was posted on the G+ Miniature Painting community board that involved a cloak being painted with a grey scale which was then painted over with what they called "Candy Paint." This technique is called underpainting and was used by some of the Dutch Masters and Titian (thanks Wikipedia). I've used this technique on miniatures before, having been introduced to it by Victoria Lamb back in the days of Yahoo Groups (at least I think she's the one who brought it up as a possible painting method. I no longer have those emails).
Strangely enough, I had recently started painting a Trollbloods Pyre Troll using this exact technique and was taking pictures for this tutorial. I decided to try underpainting in the first place because, contrary to the aforementioned tutorial, I thought it would provide me with a sort of rougher looking painting scheme that I thought would look good as fur on Confrontation's Wolfen. I painted a number of Wolfen using underpainting to what I thought was good effect. Here are two examples. On both, the fur/skin and the clothes were painted using underpainting while the rest of the figure (armor, hair, weapons) was done using "traditional" layering. I didn't use very dark shades on either model which turned out well, I think. I was able to dapple the skin of Managarm (figure on the right) to provide a little bit of texture to her skin.


I decided that I was going to underpaint the Pyre Troll while I was cleaning it. There was a fair amount of flash for a new plastic figure and I wasn't having much luck getting the scoring from the files out of the surface of the figure. The theory was the added texture would blend in better with the rougher appearance from the paint job. At least that's the theory.
A quick disclaimer: This is not a painting technique for people looking to produce "table-top" quality figures. Which is to say, it takes a bit of time to paint this way so if you like the look and decide to try to reproduce it, be prepared to spend some time with a brush in your hand. The result, hopefully, will be something you will be proud of. The point is that this takes time. I think start to finish this project took me 15-20 hours, not counting the writing of this tutorial. This is not to discourage anyone, just a word of warning.
Commonly used abbreviations:
RMSP - Reaper Master Series Paints
VGC - Valleo Game Color
VMC - Valleo Model Color
GW - Games Workshop

The first part was assembling and priming the figure. Here he is, all primed up. Because the weather in Colorado is unpredictable (once ruined a figure while sealing it due to blowing cottonwood pollen) I use a clear brush-on primer (Folk Art Glass & Tile Medium thinned 1:1 with water with a little black or dark brown ink to pick out details).
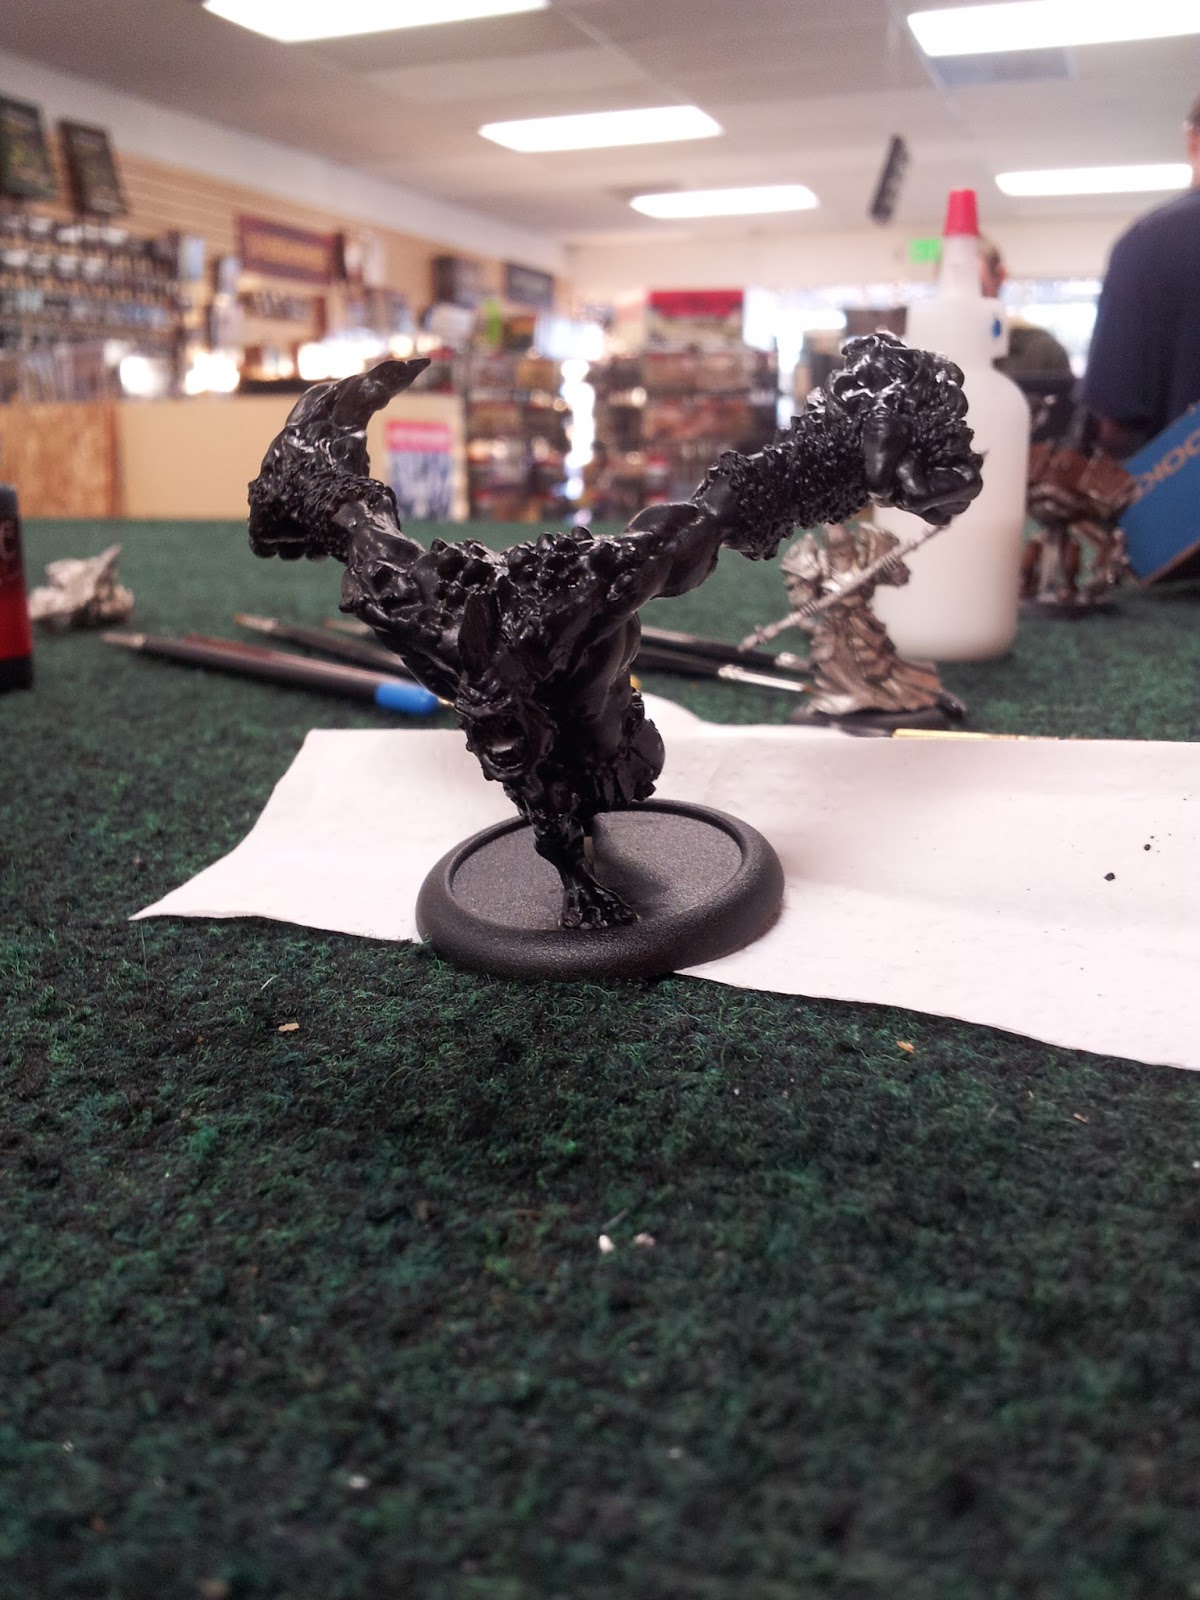
 The next step was to paint the whole model black:
The next step is where the magic starts to happen. So far all I've done is prep work. Obviously, I could have primed the thing black and then touched up with a brush and it would have been quicker (it took about 5 minutes to brush all the primer on and then about an hour to let it dry, just to be safe), but you know, weather.
With the model painted black and all the paint dry, thin some white paint about 3:1 water to paint and brush it over the whole figure (my measurements are approximate because the water dropper is a little larger than the paint dropper). I'm using VMC White and "soft" water (water with a couple of drops of Jet Dry in it). While doing this step, avoid the lowest of the low spots, leaving them black. Everything else should be kind of an ugly, dirty grey color. You'll note that I have not painted white on the inside of the mouth, the leather "loin cloth," or the chains. That's on purpose as those will get painted later. The fire on the troll's hands is painted backward. The deepest parts get the most white paint and for the most part, I left the ridges alone:


The next step is similar to the last. This time, I thin white paint about 2:1 water to paint. Paint the high spots, trying to create a grey scale from the black low parts up to the high parts. Unfortunately, I don't seem to have any pictures of this step. I'm chalking this one up to inexperience at writing tutorials.
I do have pictures of the final step which is where I thin the white about 1:1 and go over the bits that need to be highlighted the most. I usually end up doing this step twice just to make sure the highlights are very white. Remember the grey scale on the fire is done in reverse, deepest parts get the brightest whites. Here's the finished grey scale:


As you can see the highest points of the figure are now bright white. It's a little more difficult to see but there is some decent contrast between the highest points and the lowest points (beyond just the black and white).
Now, I went to work on some color. I started with a 1:1 mix of VGC Ultramarine and VGC Night Blue and thinned that 3:1 water to paint. I went ahead and just painted all the skin with this mixture. I didn't try to keep color from going into the deepest recesses of the figure. It is, however, very important that you do not allow the paint to pool in the cracks. This will cause all sorts of problems. This requires some attention to detail and wiping off your brush after you dip it into the paint but before you put it on the figure. There are lots of things to pay attention to while doing this and here's another: use an older brush while doing all of the work with thinned colors. Any fraying at the end of the brush isn't really a concern and the paint that wicks up to the ferrule won't ruin the brush if you spend too long with paint on the bristles.
Here's the results of the first coat of blue:


Note how the white is still very visible here.
The second layer of paint was just VGC Night Blue thinned 2:1 water to paint. I brushed this into the recesses of the figure avoiding any of the high surfaces in order to get a better transition from the medium blue and the black that was left from the grey scale:
 The transition is much smoother now. Look at all the brush strokes on the paper towel. That's to soak the excess paint off the brush.
The next step was a mixture of VGC Ultramarine and RMSP Snow Shadow mixed about 2:1 water to paint. This coat was the reverse of the previous, concentrating on the highlights and avoiding the deep recesses. I followed that up with a coat of pure Snow Shadow thinned 2:1 water to paint. As alluded to above, this is actually a very thin coat of paint. The Reaper paints thin more quickly than the Vallejos. I can't really guess as to how much of a difference there is but it's noticeable. Were I to do this coat with a light blue from Vallejo I'd probably thin it at least 3:1. I also painted the rocks on his back VMC English Uniform to provide some contrast.


The shading looks a lot smoother now, though the first picture is kind of blurry.
The last coat is pure VMC white, thinned 3:1. My apologies for the camera, I'm taking pictures with my phone and the differences are hard to see. Only the highest of highlights are picked out here. I took a little white paint, thinned 1:1 with water, and touched up the spines on his head fin then thinned the paint to the 3:1 ratio and did a little highlighting of the muscles.
 Hopefully it's possible to see the bright white on the head fin from this shot.
At this point, I decided his skin was finished and moved on to the flames.
 The flames were quite a bit different as I started with the lightest color in the deepest recesses and moved darker from there. I began with a VMC Deep Yellow thinned 3:1 and slathered it all over the flames.
Then I used some GW Lamenters Yellow glaze to help deepen the color. I used this stuff straight out of the bottle. The staining on the hands is intentional as I wanted to try to introduce the idea that the flames were being generated by the troll and not just existing on the skin.
 That image is on the left. The next coat was GW Hobgoblin Orange thinned 2:1. It's a very old color but most bright oranges should work (to be honest, I wouldn't expect anyone to try to recreate this using the eclectic assortment of paints that I used). I used this to hit some of the highlights.
 The next coat was VMC Transparent Red thinned 3:1. The transparent paints are very pigment rich. Though I love the transparent paints I think this coat was a bit of a mistake. I ended up not being fond of the way it sort of stained the area and it was a little too bright. Next time I'll use a medium sort of red paint. Concentrating on the highlights, make sure the paint doesn't slide down into the cracks.
 The next to last coat was VMC Black Red thinned 2:1. The black from the grey scale still shines through but that's good in this case.
 The last thing I did to the flames was to take a little bit of VMC white thinned 2:1 and touched up the "roots" of the paint. Here's a picture of the almost finished model from the top down.
 Here's a front view. The loin cloth and mouth are unfinished and the figure needs to be darklined.

Hope this was illuminating. I need to work on a few things but overall I'm pretty happy with the way this figure is turning out. There are some mold lines which are pretty obvious because of the thinness of the paint. A couple of the highlights on the muscles were a little sloppy. I don't think I'm going to paint all of my trolls this way. This figure had a lot of skin and so there's not a lot of variation in texture so this technique worked well. Next time I do something like this, I'll actually edit the pictures so they're not spread out.
The next step is where the magic starts to happen. So far all I've done is prep work. Obviously, I could have primed the thing black and then touched up with a brush and it would have been quicker (it took about 5 minutes to brush all the primer on and then about an hour to let it dry, just to be safe), but you know, weather.
With the model painted black and all the paint dry, thin some white paint about 3:1 water to paint and brush it over the whole figure (my measurements are approximate because the water dropper is a little larger than the paint dropper). I'm using VMC White and "soft" water (water with a couple of drops of Jet Dry in it). While doing this step, avoid the lowest of the low spots, leaving them black. Everything else should be kind of an ugly, dirty grey color. You'll note that I have not painted white on the inside of the mouth, the leather "loin cloth," or the chains. That's on purpose as those will get painted later. The fire on the troll's hands is painted backward. The deepest parts get the most white paint and for the most part, I left the ridges alone:


The next step is similar to the last. This time, I thin white paint about 2:1 water to paint. Paint the high spots, trying to create a grey scale from the black low parts up to the high parts. Unfortunately, I don't seem to have any pictures of this step. I'm chalking this one up to inexperience at writing tutorials.
I do have pictures of the final step which is where I thin the white about 1:1 and go over the bits that need to be highlighted the most. I usually end up doing this step twice just to make sure the highlights are very white. Remember the grey scale on the fire is done in reverse, deepest parts get the brightest whites. Here's the finished grey scale:
As you can see the highest points of the figure are now bright white. It's a little more difficult to see but there is some decent contrast between the highest points and the lowest points (beyond just the black and white).
Now, I went to work on some color. I started with a 1:1 mix of VGC Ultramarine and VGC Night Blue and thinned that 3:1 water to paint. I went ahead and just painted all the skin with this mixture. I didn't try to keep color from going into the deepest recesses of the figure. It is, however, very important that you do not allow the paint to pool in the cracks. This will cause all sorts of problems. This requires some attention to detail and wiping off your brush after you dip it into the paint but before you put it on the figure. There are lots of things to pay attention to while doing this and here's another: use an older brush while doing all of the work with thinned colors. Any fraying at the end of the brush isn't really a concern and the paint that wicks up to the ferrule won't ruin the brush if you spend too long with paint on the bristles.
Here's the results of the first coat of blue:
Note how the white is still very visible here.
The second layer of paint was just VGC Night Blue thinned 2:1 water to paint. I brushed this into the recesses of the figure avoiding any of the high surfaces in order to get a better transition from the medium blue and the black that was left from the grey scale:
The next step was a mixture of VGC Ultramarine and RMSP Snow Shadow mixed about 2:1 water to paint. This coat was the reverse of the previous, concentrating on the highlights and avoiding the deep recesses. I followed that up with a coat of pure Snow Shadow thinned 2:1 water to paint. As alluded to above, this is actually a very thin coat of paint. The Reaper paints thin more quickly than the Vallejos. I can't really guess as to how much of a difference there is but it's noticeable. Were I to do this coat with a light blue from Vallejo I'd probably thin it at least 3:1. I also painted the rocks on his back VMC English Uniform to provide some contrast.
The shading looks a lot smoother now, though the first picture is kind of blurry.
The last coat is pure VMC white, thinned 3:1. My apologies for the camera, I'm taking pictures with my phone and the differences are hard to see. Only the highest of highlights are picked out here. I took a little white paint, thinned 1:1 with water, and touched up the spines on his head fin then thinned the paint to the 3:1 ratio and did a little highlighting of the muscles.
At this point, I decided his skin was finished and moved on to the flames.
Then I used some GW Lamenters Yellow glaze to help deepen the color. I used this stuff straight out of the bottle. The staining on the hands is intentional as I wanted to try to introduce the idea that the flames were being generated by the troll and not just existing on the skin.
Hope this was illuminating. I need to work on a few things but overall I'm pretty happy with the way this figure is turning out. There are some mold lines which are pretty obvious because of the thinness of the paint. A couple of the highlights on the muscles were a little sloppy. I don't think I'm going to paint all of my trolls this way. This figure had a lot of skin and so there's not a lot of variation in texture so this technique worked well. Next time I do something like this, I'll actually edit the pictures so they're not spread out.
No comments:
Post a Comment