Monday, August 12, 2013

The Dwarven Engineer

A friend and I are trying to create a dwarven engineer class for my DnD adaptation of Cadwallon. The idea is that the Engineer is a versatile character that is a hybrid mostly between leader and striker. The class starts with a moderate damage attack and a weak heal that requires the engineer to touch whoever he's healing. 

One of the problems that we ran into is that 4e doesn't really provide a mechanic for adding on functionality after first level. Every class starts with the basic mechanics and then builds on those. My inclination was to add functionality at later levels but that cuts against everything else so we had to shoehorn everything into first level as best we could.

My fear is that the Engineer is too effective at being a striker, despite the fact that his use of encounter powers weakens his overall damage capability. My thought is that there should be a price to pay for his versatility and the slow erosion of damage production doesn't really provide enough of a trade off for bolting on million abilities. The basic attack, however, isn't as good as other strikers, I'm must not sure it's weak enough.

Anyway, here's what we have so far. Constructive criticism is very welcome and appreciated:

The Dwarven Engineer:

Class Traits
Role: Striker
Power Source: Steam. You build machines and power them with Steam.
Key Abilities: Int, Dex, Con

Armor Proficiencies: Cloth, Leather, Hide
Weapon Proficiencies: Simple Melee, Simple Ranged, Gunpowder weapons
Bonus to Defense:  +2 Ref

Hit Points at 1st Level: 14 + Con Score
Hit Points per Level Gained: 5
Healing Surges per Day: 7 + Constitution modifier
Trained Skills: Engineering
Class Skills: Choose Three of the following -
Dungeoneering (Wis), Endurance (Con), Heal (Wis), Insight (Wis), Perception (Wis), and Thievery (Dex)

Dwarven Engineering is the study of steam and its uses. Devotees of this path work to harness the power of steam and metal. Novices content themselves with clunky pieces of machinery built through trial and error. Masters of this art can make huge machines powered by the fires of rare ores or tiny devices that are almost magical.

Engineers begin the game with a steam generator and a steam powered hyper-rifle. They also begin the game with a couple of other gadgets. These represent what they’ve been working on since they were a little dwarf. The finally design of this equipment is always different but they fall into these broad categories.

Shoulder mounted steam engine:
The shoulder mounted steam engine is a backpack sized steam generator. The secrets of the inner workings are usually closely guarded by the engineer. The steam from the engine can be used to power the engineers equipment. Generally, the steam drawn from the boiler chamber isn’t enough to trouble the engine. Some pieces of equipment, however, take a great deal of power which can cause strain on the mechanisms.

The amount of strain a particular engine can produce is represented by steam points. These steam points can be spent during an encounter to power pieces of equipment that might only be used in an emergency or just require a great deal of power to use. Using the steam points depletes the boilers steam reservoir, strains the mechanisms to the breaking point, or a combination of the two. Once steam points are exhausted, a short rest is required to either allow the steam to build back up or to make the minor repairs necessary to get the engine back in working order. As the Engineer increases his knowledge, the sophistication and sturdiness of his machines increase.

Level
Steampoints
1
3
3
4
5
5


Class Features:
Hyper-Rifle Shot:
At-will ◆ Steam, Weapon
Standard Action Range 10
Target: One Creature
Attack: Int vs. AC
Hit: 1d10 + Int Damage plus additional damage equal to the number of steam points still in the boiler.
Special: This can be used as a basic ranged attack.

Elighir’s Monumental Energy Injector:
Encounter ◆ Steam, Healing
Special: This may be used twice per encounter.
Requirement: You must spend a steam point.
Minor Action Melee 1
Target: One ally
Effect: The ally may spend a healing surge and gain surge value + Con mod hit points.
Also, gain +1 steam bonus to speed until the end of the engineer’s next turn.

Level 1 At-will Attacks: (Choose 2)
Khor Runner’s Bolo-Gun:
It’s often prudent to slow an enemy down to get a little distance between you and the enemy so the engineers have mimicked the bolos used by the dwarven Khor runners.
At-will ◆ Steam, Weapon
Standard Action Range 5
Target: One Creature
Attack: Int vs. Ref
Hit: 1d6 + Int damage and target is knocked prone.
Steam Point: The target takes an additional 1d6 damage and is immobilized (save ends).

Steam powered mechanical screwdriver
At-will ◆ Steam, Weapon
Standard Action Melee 1
Target: One Enemy
Attack: Int vs AC
Hit: 1d8 + Int damage.
Special: If the target has the mechanical or construct keywords it takes additional damage equal to your dex modifier.
Steam Point: The target takes an additional 1d8 damage and is weakened (save ends).

Arc-lightning Generator
This rifle attachment generates an electrical charge that can be discharged against your foes.
At-will ◆ Steam, Lightning, Weapon
Standard Action Range 3
Target: One creature
Attack: Int vs. Reflex
Hit: 1d6 + int modifier lightning damage.
Effect: A creature within 2 squares of the target takes lightning damage equal to your Con modifier.
Steam point: The target takes an additional 2d6 damage and you may repeat the effect once, but the second creature has to be within 2 squares of the first.

Rapid Fire
At-will ◆ Steam, Weapon
Standard Action Range 10
Target: One Creature
Primary Attack: Int vs. AC
Primary Hit: 1d10 damage.
Effect: Make a secondary attack against an enemy within 3 squares of the target.
Secondary Attack: Int vs. AC
Secondary Hit: 1d10 damage.
Steam Point: You may repeat the Secondary Attack two more times.

Level 1 Daily Powers: (choose 1)
Vent Power Source
In an emergency, the steam engine can be vented, either to prevent a blowout or to damage and confuse enemies.
Requirement: You must spend a steam point.
Daily ◆ Steam, Weapon
Standard Action Close burst 2
Target: All creatures in burst
Attack: Int vs Fort
Hit: 1d10 + Engineering skill damage and the target is pushed 1 square and knocked prone.
Effect: Create a zone of steam in the burst that grants concealment until the end of your next turn.

High Pressure Shot:
You allow pressure to build up behind the projectile in the gun’s barrel, straining hoses and barrel alike.
Daily ◆ Steam, Fire, Weapon
Standard Action Ranged 10
Target: One Creature
Attack: Int vs AC
Hit: 2D6 + Dex fire damage and everyone adjacent to you takes Con mod steam damage as your engine releases pressure.
Steam Point: The target takes an additional 1d6 fire damage and takes 5 ongoing fire damage (save ends).


Level 2 Utility powers:
Elghir’s Clumsy Defibrillator:
Encounter
Range: Melee
Target: One unconscious ally
Using the defibrillator on the target allows them to immediately spend a healing surge. They also stand up immediately and have +2 Ref until the end of the Engineer’s next turn. Target may not perform any abilities that require speech (including talking to party members, giving instructions, or singing) during this period because they are too busy screaming in pain.


Level 3 Encounter:
Fragmentation shot:
Allowing a build up of steam behind a bullet will sometimes shatter the projectile as it leaves the barrel of the hyper rifle.
Close blast three
Dex vs. AC against all targets in blast
1d8 + dex damage

All affected are at -2 to attack until the end of the Engineer’s next turn because of the painful shards lodged in their skin

Monday, July 29, 2013

Board Games, RPGs and Night's Black Agents

Our Sunday gaming group has been on a moratorium. We lost a couple of players and found out the latest Ashes of Athas installment would be the last. Our Dark Sun game lost momentum and sputtered out, despite heroic efforts by Rob, the DM at the time. We picked up some new blood and were muddling around trying to figure out what to do. The moment seemed right to start back up with the Sunday game but I had only just started working on an adaptation of the Cadwallon world to DnD (long story short, it's the system people are used to). Not willing to move ahead with an unfinished product, I picked up my copy of "Night's Black Agents," so as to give myself some time to finish the first phase of world development.

For those unfamiliar with the Night's Black Agents, it covers a world of intrigue where the characters play spies/secret agents in a modern world where Vampires exist and pull strings behind the scenes. It's based on the GUMSHOE system by Robin Laws. It's a simple enough system that allows for cinematic action without a lot of mechanics to bog things down. My brother sent me a copy (seemingly signed so I assume Kickstarter?) but I hadn't given it much thought. I read through the rules in a couple of days and decided to run with it.

The first part of prep was to re-read the important rules, chases and combats are the most complicated but there's really no tactical element (somewhat less important where you are on a battle mat when you're dealing with bullets as opposed to swords). Second was to steal a page from board gaming and make a whole bunch of little circular tokens that represented each skill. The idea behind doing this was that I was making all the characters for my players. I told them very little about the game in order to preserve a layer of mystery. I didn't tell them about vampires or any of the other supernatural things that could (and would) happen to them in the game. Instead of a character sheet, I handed them a dossier with a character history, a couple of cards that represented unspent characters points and their MOS (military operation specialty, basically an auto-success once per session), and a couple of plastic baggies full of counters that looked like this:


In the GUMSHOE system, each skill point adds to a pool for that skill. Each point in the pool can be used to get some answers from the DM (in the case of investigative skills), to boost chances of success, or to do something totally awesome (in the case of general skills). My hope was that this would help with immersion and would ease game play, giving some new players (and a new DM) a little bit of help with the gravity of spending points from the pool. The other hope was that I could avoid the players needing a character sheet (there aren't really any stats) and I could handle the bookkeeping, leaving them to think of awesome cinematic things to do while they roleplayed. 

Unfortunately, best laid plans and all that. I didn't make enough counters (nor did I get the fake money to put into the dossier folders and didn't manage to stencil the full names on to the folders...) and wasn't able to sort them into baggies before the session. When I set out on this project, I didn't realize that there are 62 possible skills (health, mental stability, and languages being skills) that I needed to make counters for. I also didn't appreciate the number of each counter that I would need to make so I ended up shorting a lot of the investigative skills since there was a great deal more overlap than I had expected (next time, make characters first!). So, in the end, I gave the players their sheets. 

Fortunately, no one paid much attention to the Vampirology skill and the undead guy in the adventure came as a total surprise. The session ended on a high note with the Analyst character taking some vodka he had bought (and explicitly brought with him in order to try to bribe some guards), making it into a Molotov Cocktail and rolling a six to hit the baddie square in the face.

The players enjoyed having the counters, even if there weren't quite enough. We're going to try to finish up the adventure next session so we'll see how things go on the second attempt. I have high hopes that we'll get some great descriptive roleplaying. The party was getting into the spy setting by the end of the session and things were starting to get interesting.

Last thing about the counters: I got the process for making them off a Board Game Geek forum post by Nick Hayes. I made the counter icons in Paint.Net. I bought a 1 inch Arch Punch, a cheap rubber mallet, a package of chip board and a cheap cutting board to make the counters (I had some spray glue already). I printed the sheets out at FedEx/Kinkos cuz I don't have the wherewithal to buy ink for my printer. All in all, it cost me about $40 (about half of which was the Arch Punch). I'm not too concerned by the cost since all but $7 was equipment necessary for reproducing the process. I was able to put 56 1 inch counters on a sheet of 8.5x11 paper and made 11 sheets so it comes out to about 6.5 cents per counter, I think. Next batch will be just the time and the printing costs.

I didn't bother to make the counters double sided (I'm lazy). The chipboard offers some nice heft to the counter but if you wanted, you could probably make them out of heavyweight card paper. Here's a picture of the back and sides:


If you like this idea and don't want to take the time to make your own counter icons, profit from my hard work. The counters are here (I'm hosting them on Dropbox because Google Docs changed the formatting). I'm sort of embarrassed by the pictures on a few of them so if you have a better suggestion for an icon, please let me know. If you're offended by any of them, also let me know. As far as I know, I used free images but if not, let me know and I'll change whichever icon you wish. I'm not big on infringing on copyrights.

Thursday, January 24, 2013

Painting the Pyre Troll

Underpainting With A Brush
A while ago, a tutorial was posted on the G+ Miniature Painting community board that involved a cloak being painted with a grey scale which was then painted over with what they called "Candy Paint." This technique is called underpainting and was used by some of the Dutch Masters and Titian (thanks Wikipedia). I've used this technique on miniatures before, having been introduced to it by Victoria Lamb back in the days of Yahoo Groups (at least I think she's the one who brought it up as a possible painting method. I no longer have those emails). 
Strangely enough, I had recently started painting a Trollbloods Pyre Troll using this exact technique and was taking pictures for this tutorial. I decided to try underpainting in the first place because, contrary to the aforementioned tutorial, I thought it would provide me with a sort of rougher looking painting scheme that I thought would look good as fur on Confrontation's Wolfen. I painted a number of Wolfen using underpainting to what I thought was good effect.  Here are two examples. On both, the fur/skin and the clothes were painted using underpainting while the rest of the figure (armor, hair, weapons) was done using "traditional" layering. I didn't use very dark shades on either model which turned out well, I think. I was able to dapple the skin of Managarm (figure on the right) to provide a little bit of texture to her skin.


I decided that I was going to underpaint the Pyre Troll while I was cleaning it. There was a fair amount of flash for a new plastic figure and I wasn't having much luck getting the scoring from the files out of the surface of the figure. The theory was the added texture would blend in better with the rougher appearance from the paint job. At least that's the theory.

A quick disclaimer: This is not a painting technique for people looking to produce "table-top" quality figures. Which is to say, it takes a bit of time to paint this way so if you like the look and decide to try to reproduce it, be prepared to spend some time with a brush in your hand. The result, hopefully, will be something you will be proud of. The point is that this takes time. I think start to finish this project took me 15-20 hours, not counting the writing of this tutorial. This is not to discourage anyone, just a word of warning.

Commonly used abbreviations:
RMSP - Reaper Master Series Paints
VGC - Valleo Game Color
VMC - Valleo Model Color
GW - Games Workshop

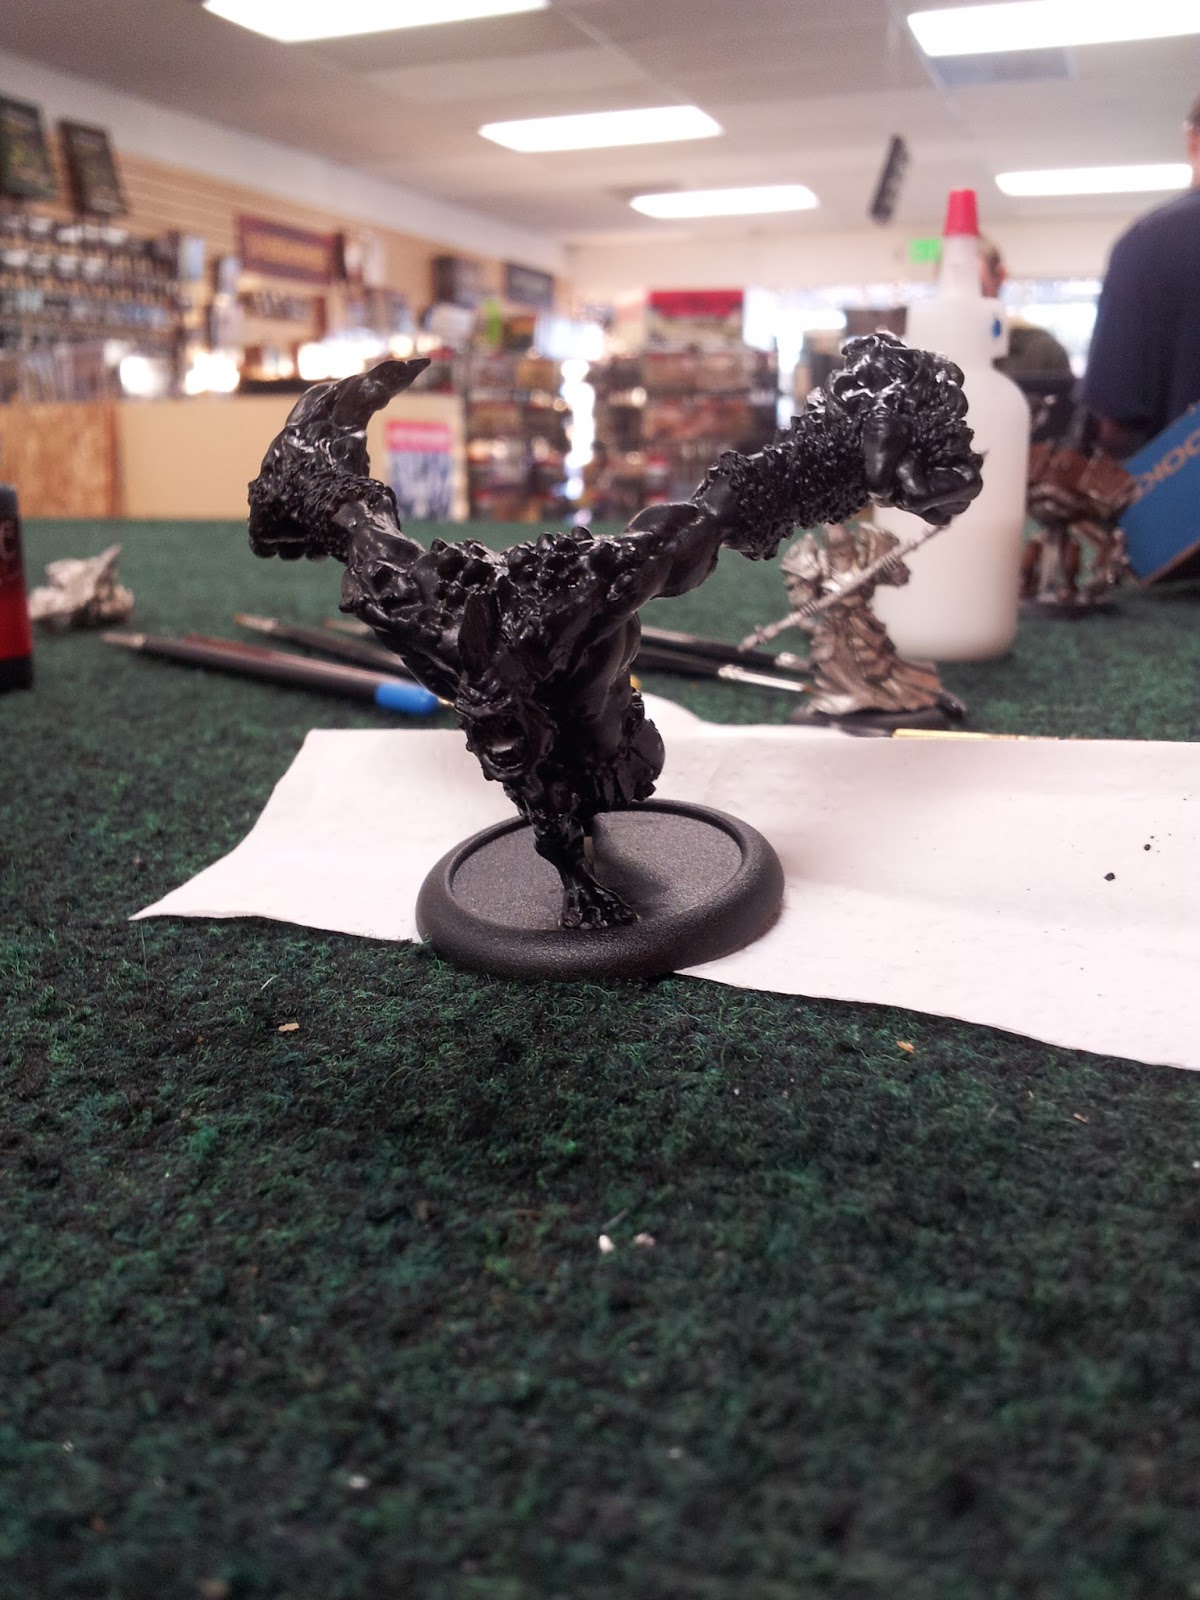
The first part was assembling and priming the figure. Here he is, all primed up. Because the weather in Colorado is unpredictable (once ruined a figure while sealing it due to blowing cottonwood pollen) I use a clear brush-on primer (Folk Art Glass & Tile Medium thinned 1:1 with water with a little black or dark brown ink to pick out details).


The next step was to paint the whole model black:


The next step is where the magic starts to happen. So far all I've done is prep work. Obviously, I could have primed the thing black and then touched up with a brush and it would have been quicker (it took about 5 minutes to brush all the primer on and then about an hour to let it dry, just to be safe), but you know, weather.

With the model painted black and all the paint dry, thin some white paint about 3:1 water to paint and brush it over the whole figure (my measurements are approximate because the water dropper is a little larger than the paint dropper). I'm using VMC White and "soft" water (water with a couple of drops of Jet Dry in it). While doing this step, avoid the lowest of the low spots, leaving them black. Everything else should be kind of an ugly, dirty grey color. You'll note that I have not painted white on the inside of the mouth, the leather "loin cloth," or the chains. That's on purpose as those will get painted later. The fire on the troll's hands is painted backward. The deepest parts get the most white paint and for the most part, I left the ridges alone:


The next step is similar to the last. This time, I thin white paint about 2:1 water to paint. Paint the high spots, trying to create a grey scale from the black low parts up to the high parts. Unfortunately, I don't seem to have any pictures of this step. I'm chalking this one up to inexperience at writing tutorials.

I do have pictures of the final step which is where I thin the white about 1:1 and go over the bits that need to be highlighted the most. I usually end up doing this step twice just to make sure the highlights are very white. Remember the grey scale on the fire is done in reverse, deepest parts get the brightest whites. Here's the finished grey scale:


 As you can see the highest points of the figure are now bright white. It's a little more difficult to see but there is some decent contrast between the highest points and the lowest points (beyond just the black and white).

Now, I went to work on some color. I started with a 1:1 mix of VGC Ultramarine and VGC Night Blue and thinned that 3:1 water to paint. I went ahead and just painted all the skin with this mixture. I didn't try to keep color from going into the deepest recesses of the figure. It is, however, very important that you do not allow the paint to pool in the cracks. This will cause all sorts of problems. This requires some attention to detail and wiping off your brush after you dip it into the paint but before you put it on the figure. There are lots of things to pay attention to while doing this and here's another: use an older brush while doing all of the work with thinned colors. Any fraying at the end of the brush isn't really a concern and the paint that wicks up to the ferrule won't ruin the brush if you spend too long with paint on the bristles.

Here's the results of the first coat of blue:


Note how the white is still very visible here.

The second layer of paint was just VGC Night Blue thinned 2:1 water to paint. I brushed this into the recesses of the figure avoiding any of the high surfaces in order to get a better transition from the medium blue and the black that was left from the grey scale:

The transition is much smoother now. Look at all the brush strokes on the paper towel. That's to soak the excess paint off the brush.


The next step was a mixture of VGC Ultramarine and RMSP Snow Shadow mixed about 2:1 water to paint. This coat was the reverse of the previous, concentrating on the highlights and avoiding the deep recesses. I followed that up with a coat of pure Snow Shadow thinned 2:1 water to paint. As alluded to above, this is actually a very thin coat of paint. The Reaper paints thin more quickly than the Vallejos. I can't really guess as to how much of a difference there is but it's noticeable. Were I to do this coat with a light blue from Vallejo I'd probably thin it at least 3:1. I also painted the rocks on his back VMC English Uniform to provide some contrast.


The shading looks a lot smoother now, though the first picture is kind of blurry.

The last coat is pure VMC white, thinned 3:1. My apologies for the camera, I'm taking pictures with my phone and the differences are hard to see. Only the highest of highlights are picked out here. I took a little white paint, thinned 1:1 with water, and touched up the spines on his head fin then thinned the paint to the 3:1 ratio and did a little highlighting of the muscles.

Hopefully it's possible to see the bright white on the head fin from this shot.


At this point, I decided his skin was finished and moved on to the flames.

The flames were quite a bit different as I started with the lightest color in the deepest recesses and moved darker from there. I began with a VMC Deep Yellow thinned 3:1 and slathered it all over the flames.
Then I used some GW Lamenters Yellow glaze to help deepen the color. I used this stuff straight out of the bottle. The staining on the hands is intentional as I wanted to try to introduce the idea that the flames were being generated by the troll and not just existing on the skin.


That image is on the left. The next coat was GW Hobgoblin Orange thinned 2:1. It's a very old color but most bright oranges should work (to be honest, I wouldn't expect anyone to try to recreate this using the eclectic assortment of paints that I used). I used this to hit some of the highlights.

The next coat was VMC Transparent Red thinned 3:1. The transparent paints are very pigment rich. Though I love the transparent paints I think this coat was a bit of a mistake. I ended up not being fond of the way it sort of stained the area and it was a little too bright. Next time I'll use a medium sort of red paint. Concentrating on the highlights, make sure the paint doesn't slide down into the cracks.


The next to last coat was VMC Black Red thinned 2:1. The black from the grey scale still shines through but that's good in this case.


The last thing I did to the flames was to take a little bit of VMC white thinned 2:1 and touched up the "roots" of the paint. Here's a picture of the almost finished model from the top down.


 Here's a front view. The loin cloth and mouth are unfinished and the figure needs to be darklined.


Hope this was illuminating. I need to work on a few things but overall I'm pretty happy with the way this figure is turning out. There are some mold lines which are pretty obvious because of the thinness of the paint. A couple of the highlights on the muscles were a little sloppy. I don't think I'm going to paint all of my trolls this way. This figure had a lot of skin and so there's not a lot of variation in texture so this technique worked well. Next time I do something like this, I'll actually edit the pictures so they're not spread out.